How to Make Adobe Bricks
This article is part of our How-To Series, offered to support the study and practice of sustainable and compassionate living. Please take all sensible precautions if putting these ideas into practice. Those with less experience are advised to seek guidance and support from experienced practitioners, ideally those well-acquainted with best practices.
Quick facts
OUR BASIC BRICK SIZE
12”x6”x3”
OUR MATERIALS
1) Earth mix with the right balace of soil constituents:
coarse sand
fine sand
silt
clay
2) Rice husk*
3) Pine needles**
4) Water
* Rice husk can be substituted with finely -chopped straw.
** Pine needles can be substituted with straw cut to short lengths, i.e. 3-5 inches.
OUR TOOLS
Shovel
Mattock / pick
Sieve with ˜0.5"x0.5”mesh
Buckets
Large bowls or trays
Brick frames (details in article)
COST
Potentially none! (If all materials are sourced on your own site)
TIME
Approx. 15-25 days
STEPS
Dig suitable soil
Sieve the dry soil
Pug (mix well with water)
Form bricks using moulds
Let bricks dry in sun
How-To Articles
Overview
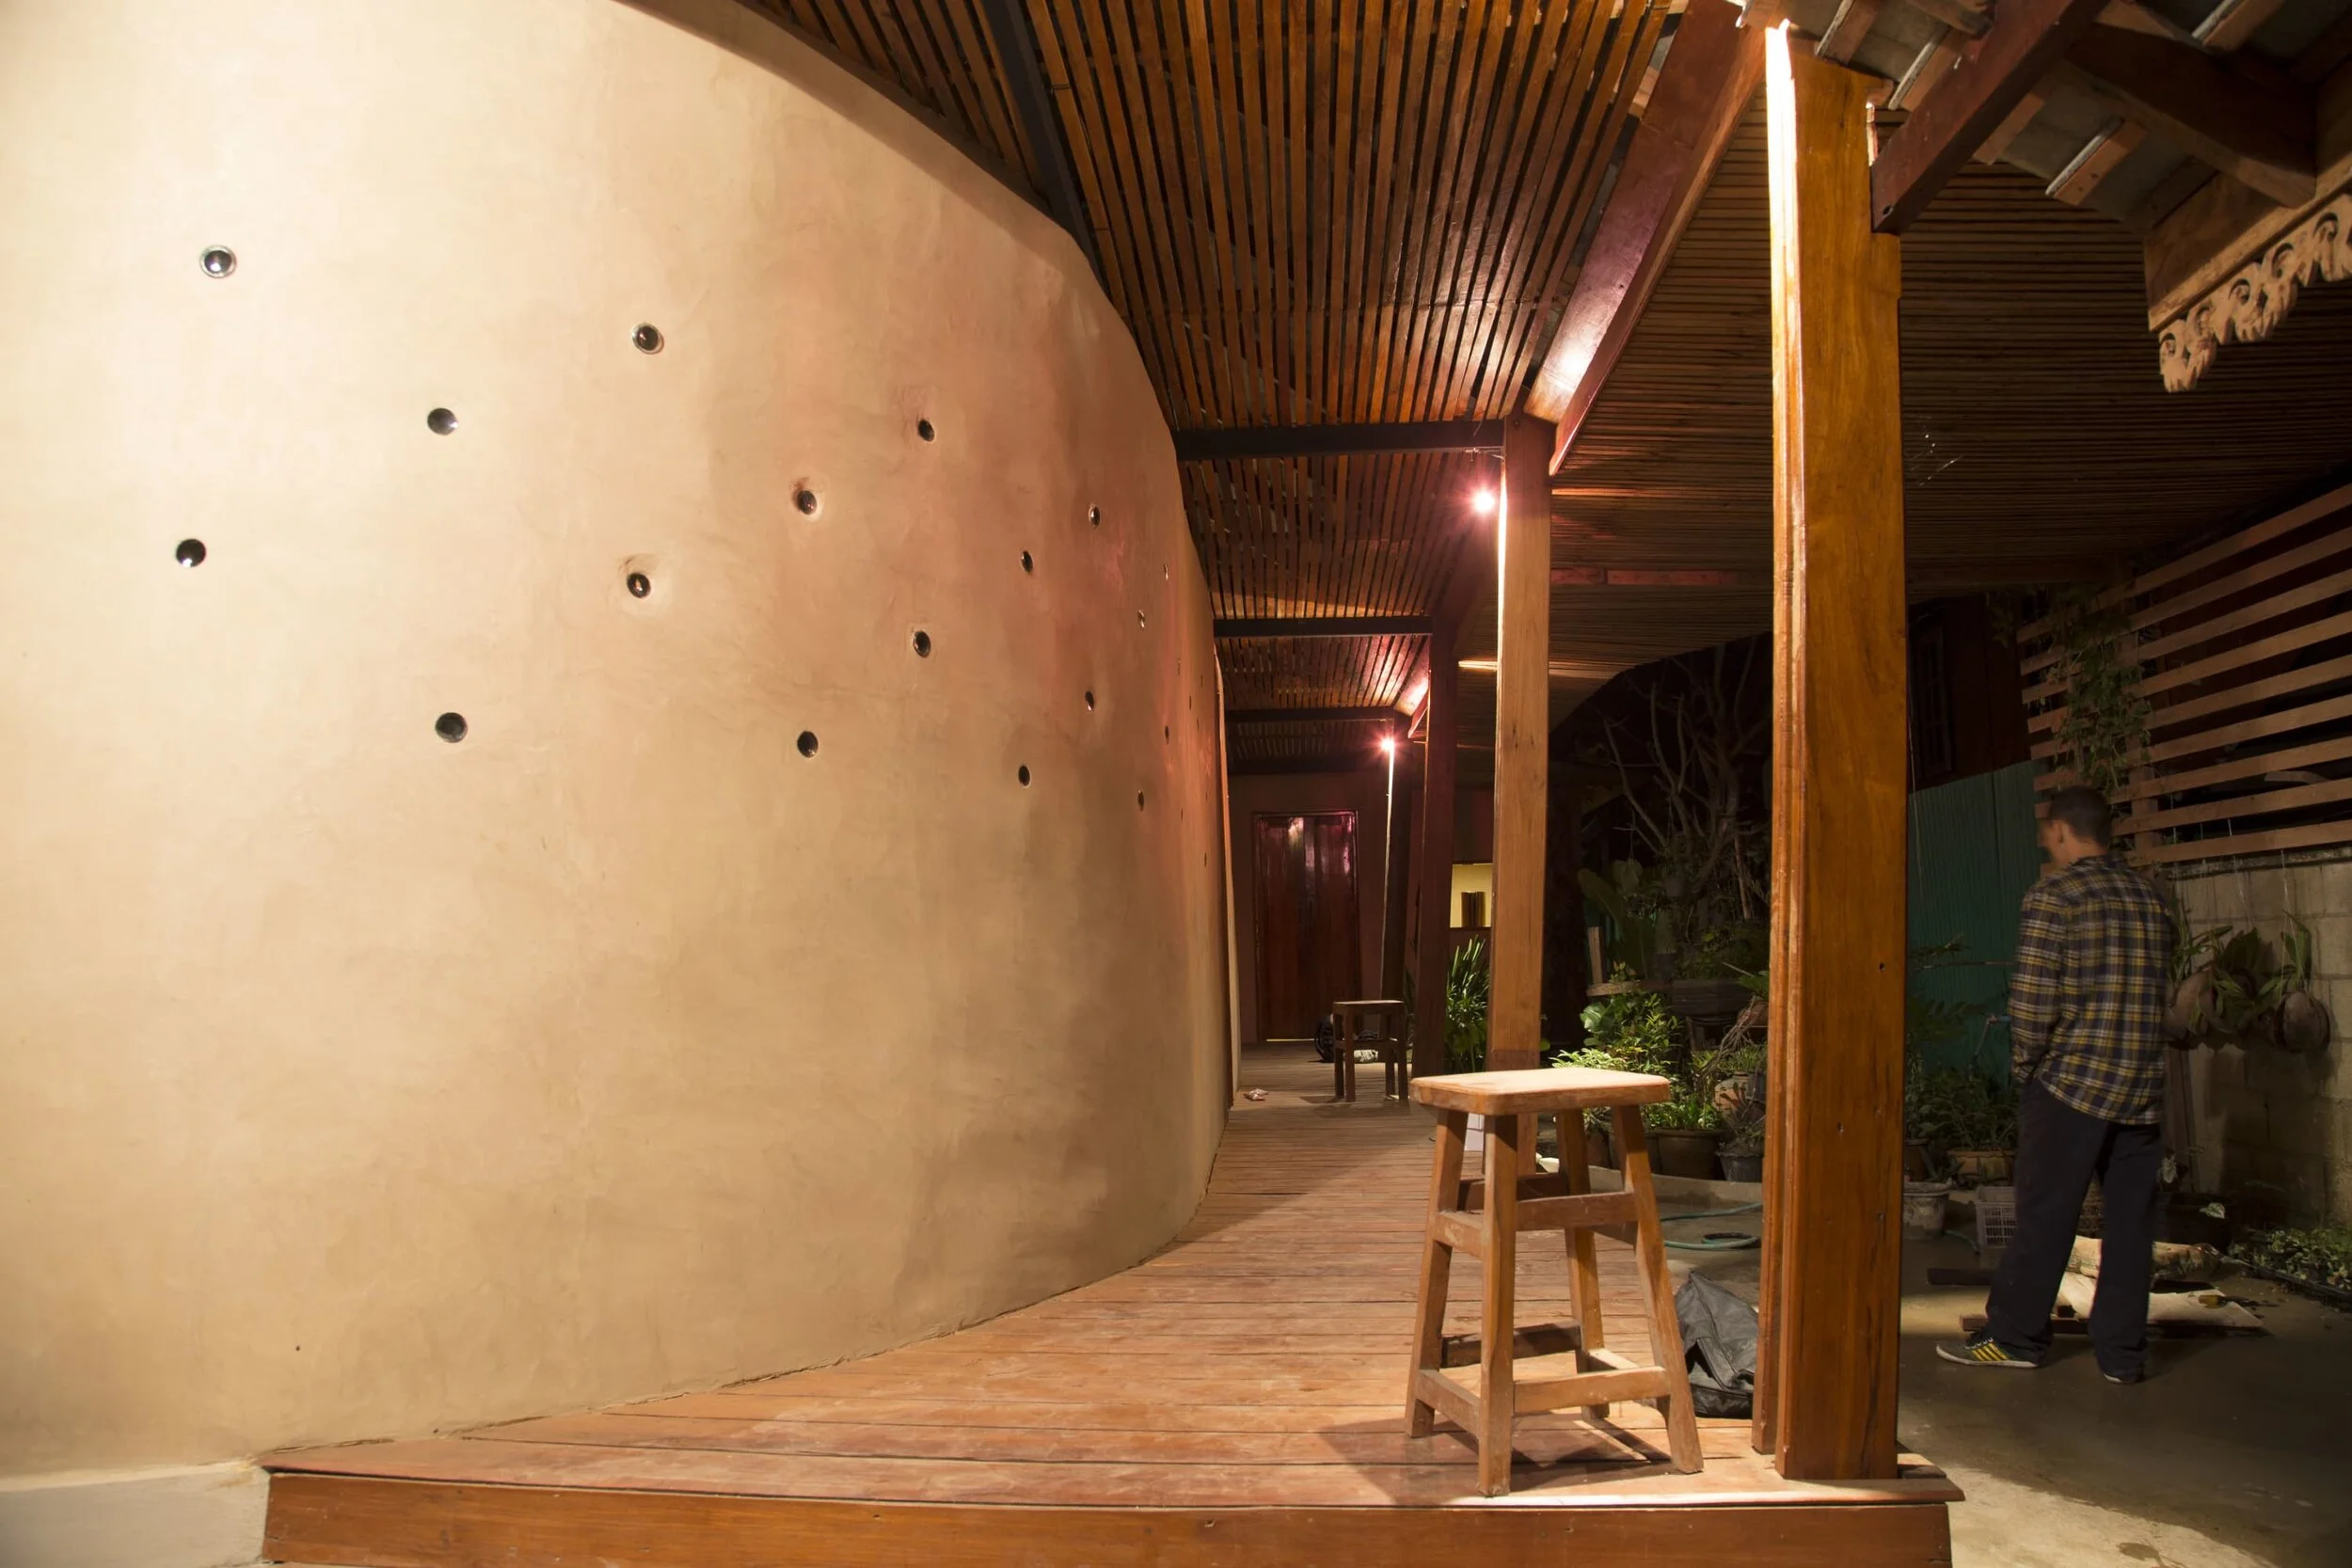
Earth can be used in many shapes and forms for construction, but around the world one of the most common (and well-proven) methods is to shape the earth into the form of bricks and then dry them in the sun. These sun-dried earthen bricks are widely known as ‘adobe’. (The word adobe comes from the Spanish language and is pronounced ah-DOH-beh.)
There are adobe buildings around the world that are still standing after many centuries, even millennia, making adobe one of the most time-tested, well-proven building techniques in existence — but only if one follows best practices! As the saying goes, ‘a chain is only as strong as its weakest link’, and the same is true for buildings. So, with that in mind, let’s take a closer look at the very first element of an earthen structure using adobe bricks: the brick itself.


Main ingredients
The main material for an adobe brick is the earth. An ideal adobe brick begins with a well-mixed combination of:
a suitable soil containing coarse sand, fine sand, silt, and clay (with the clay content ranging between 15-20%); and
fibrous plant material (e.g. straw, pine needles, rice husk, et al.)
water
Sand & silt
The sand particles look like smaller broken pieces of rock that range in size between 2mm-125 μm. Silt is nothing other than sand with even smaller particles. One should be aware of the distribution of differently sized particle in the sand and silts.
The more the variation in the grading (particle size) of the sand and silt, the better, as during the process of mixing them thoroughly with water all these variously sized particles will find their way into the most compact arrangement they can have with one another, resulting in a stronger brick.
Clay
The clay particles, on the other hand, look like broken pieces of glass, with the size ranging between 0.98–3.9 μm.
These particles help in creating the magic of binding which sticks together when water particles come between the clay particles and the force of surface tension causes the water to bind the clay particles together in the adobe mix.
You can imagine this exactly as the common high-school science experiment used to teach about surface tension by witnessing the cohesive force of water when placed between two plates of glass. The cohesive force between the glass and water is so strong that it is difficult to pull the pieces apart. The same principle of surface tension works here for us to create a great bond between our clay particles and the water, making a strong earth mixture, and therefore strong bricks (assuming other best practices are also followed, as we’ll get to below).
Sand and clay are the key materials that need to be checked accurately to get a perfect brick mix. To prepare a good earth mix for our building material we need to get the benefits of both the sand and the clay. This is important because sand and clay have different jobs in the mixture, the sand is the aggregate and the clay is the binder. The first best practice is to ensure the ratio of the two is in the ideal range.What we really want is to have a sufficient amount of clay well-bonded with water, which in turn glues together the various sizes and shapes of sand and silt particles to help us achieve a compact and heterogenous mix of earth.
Effect of particle size & grades of aggregate
Any typical soil is composed of different sizes of particles that vary from the size of a boulder down to rocks, gravel, sand, silt and clay. All of these (with the exception of pure clay) may be similar in composition, but vary in size and shape, so they are essentially different grades of aggregate. A brick is stronger when the gaps between larger particles are filled by smaller particles, and the gaps between those smaller particles are filled by even smaller ones, and so on. Different sizes and shapes of aggregate help in creating a tightly packed mixture with no discernible gaps in between the particles, which helps in creating a strong and compactable earth mix. If the mixture were more homogenous, containing only particles of roughly the same size, then the bricks made with such a mixture would be loose and easy to break because of the lack of variation in particle size.
Additional ingredients
In addition to the main ingredients above, other materials are often included in the brick mix as well, depending on the requirement of the brick and the availability of materials. In many regions it is common to add small cuttings of straw to a brick mix, which adds tensile strength and insulating value while also reducing the weight of each brick. You can think of them as countless miniature re-bars, each of which provides little added strength on its own, but with tens of thousands of them together, it adds up.
Pine needles
In our region of the Himalayas, however, it is more common to use pine needles for the same purpose (tensile reinforcement) as they are abundantly available here. Pine needles also bring an extra benefit not provided by straw, which is that the oils in the pine needles serve as a repellent for some insects, helping to protect the adobe bricks from some kinds of burrowing pests.
Rice husk
The other material that we add to the brick is in our area is rice husk, which is an agricultural by-product that we get from the farmers in nearby villages. Rice husk adds both thermal and acoustic insulation to the bricks and also further reduces brick weight, making them easier to handle without dropping.
The amount of both the pine needles and the rice husk should be worked out depending on one’s requirements. We generally add around 5% each of pine needles and rice husk to our earth mixes.
Preparation of the ingredients and testing for the correct ratios
This part of the process is very important as this helps us ascertain whether the soil on our site is actually suitable for adobe or, if not, then what other techniques might be better suited for building with the available soil.
You can get your soil samples tested in a lab for a detailed report (which isn’t a bad idea for less-experienced earthen builders), but there are also several traditional and low-tech methods that can be used effectively after some experimentation, observations and experience. These traditional field tests include:
Bottle test
Pour a small soil sample into a clear bottle that is about 3/4 filled with water
shake it vigorously, and then
place it standing up on a flat surface to rest for a while.
Wait for a few hours. The heaviest particles (sand) will sink to the bottom, the lightest particles (clay) will float to the top, and middling particles (silt) will stay in between.
This will give you a clear visual understanding of the ratios of particles in your soil sample.
The sign of an ideal mix for adobe would be that the clay band at the top takes up about 15-20% of the total space, while the rest underneath is a fairly heterogenous mixture of sand and silt, visible as a gradual change in particle size from bottom to top.
The bottle test can be used to test soil samples from different spots on your site, and should be used again after making your mix piles (but before adding water to them).
‘Laddoo’ test
Take a handful of your earth mix and slowly add drops of water to it while repeatedly squeezing it in your palm (by making a fist around it).
Keep adding water slowly until it retains the shape of a ball after squeezing it. (Pro tip: Be careful not to add too much water or else the test won’t tell you anything useful; it’s important that you use just barely enough water so that the earth will hold together in the shape of a ball when squeezed).
Once you’ve made the ball, stretch your arm straight out at shoulder height, and drop the ball on the ground.
Examine the ball to see how it broke when it hit the ground.
> If the ball crumbled to dust that means either there isn’t enough clay in the soil (compared to the sand and silt) or you didn’t use enough water.
> If the ball splats into a single flatter blob without breaking at all, that means either there’s too much clay in the mix (compared to the sand and silt) or you used too much water. (Its important to get the water amount just right so it doesn’t spoil the test.)
> If the ball breaks into just a few pieces — neither crumbling to dust nor holding together in a single blob — that’s a pretty good sign that your sample has a decent and usable clay-to-sand ratio (but, again, this is only reliable if you used the correct amount of water as described above).
Compression test
Use your hand to make a ball out of the earth mix by squeezing it as tightly as possible in your palm.
Let it cure for a day or three by leaving it to rest undisturbed (ideally in the sun).
After curing, place the ball on a flat surface and put pressure on the ball.
This will give you a hint of the compressive strength of the mix (which influences how much load the bricks made from this mix might be able to support).
This test is most interesting when done as a comparison between balls made from mixes of different compositions, such as you might find from different locations on your site. Again, more insight is gained through more experimentation and careful observation.
Observations through touch, smell, and colour
The texture and colours of the soils change drastically depending not just on their composition but also on water content (whether they are dry or slightly moist or completely saturated with water). Thus repeated close observation over time helps us explore the soil in terms of its texture and smell, helping us understand the properties of the earth, and how those different properties correspond with different behaviours.
Different amounts of clay and/or sand work differently in the mix, so a good understanding of how each material behaves is important. For example, if the mix has a lot of clay then it can crack easily.
Thus, there is no substitute for experimenting and testing to build deeper understanding through experience over time.
It is very important for any earth mix to pass these tests to qualify for use in making adobe bricks for building purposes. If it does, then we can go ahead to start our process of making an adobe brick.
Tools & materials to gather on site
The tools we use here are:
Shovel: for digging, gathering, and shaping the earth mixes.
Mattock/pick: for digging, gathering, and shaping the earth mixes.
Sieve with 0.5”x0.5” mesh (or something very close to that): helps in sieving out the gravel and larger pebbles from the mud, which makes the soil easier to pug and makes it easier to make bricks with smooth surfaces.
Buckets: for carrying water to be mixed into the earth mix.
Large bowls or trays: for passing the material from one spot to another.
*Brick frames/moulds: give the shape to the adobe brick.
*Size of bricks and brick moulds
Note that different sizes of bricks are used in different places for different needs. Here, for convenience, we make our standard bricks 12”x6”x3”, so those are the inside dimensions of our standard brick frames/moulds.
The outer dimensions of our full-size brick frames are 14”x8”x5”, but of course frames made with varying thicknesses of would have different outer dimensions; what’s more important is the inside dimension.

Our standard brick frame. Inner dimensions are 12”x6”x3”
The materials we need are:
The earth mix that has passed all the above-mentioned tests, with appropriate ratios of coarse sand, fine sand, silt, and clay.
Rice husk (can be substituted with finely-chopped straw)
Pine needles (can be substituted with straw cut to short lengths, i.e. 3-5 inches)
Water
The process of making bricks
We’re ready to start making bricks!
It’s worth emphasising again that we must be mindful about each and every step of the process right from the start to the very end until the brick becomes a part of the structure, because being aware of each step can make the difference between the building standing or falling!
The process happens in four steps:
Sieving
Pugging
Forming
Drying.
Sieving the soil
The sieving helps separate the large particles of gravel from the finer particles. (We want to avoid large rocks in our bricks as it disturbs the texture of the mix, can create air gaps, and makes it harder to keep the brick surfaces smooth, so the large rocks are sieved out and can be set aside for another purpose, such as a natural pavement for trails.)
Once we’ve identified a spot on our site where the soil has the right composition for adobe (as described above), the soil in this spot is dug up using a pick/mattock and shovel.
First, all of the topsoil is carefully removed and preserved for use in the garden beds. Topsoil is the most precious resource for growing plants, and thus never to be wasted by using it in construction.
Next, the subsoil is dug up, moved to the depot (the brickmaking site) and sieved using the 0.5x0.5” mesh.
Notes:
- Propping the sieve on an angle allows gravity to do some work for you. As you shovel subsoil to the top portion of the sieve, particles run down and, if small enough, fall through the mesh.
-The soil must be dry to pass through the sieve, so if there’s a chance of rain you’ll want to keep your dry soil piles covered until after they’ve been sieved.

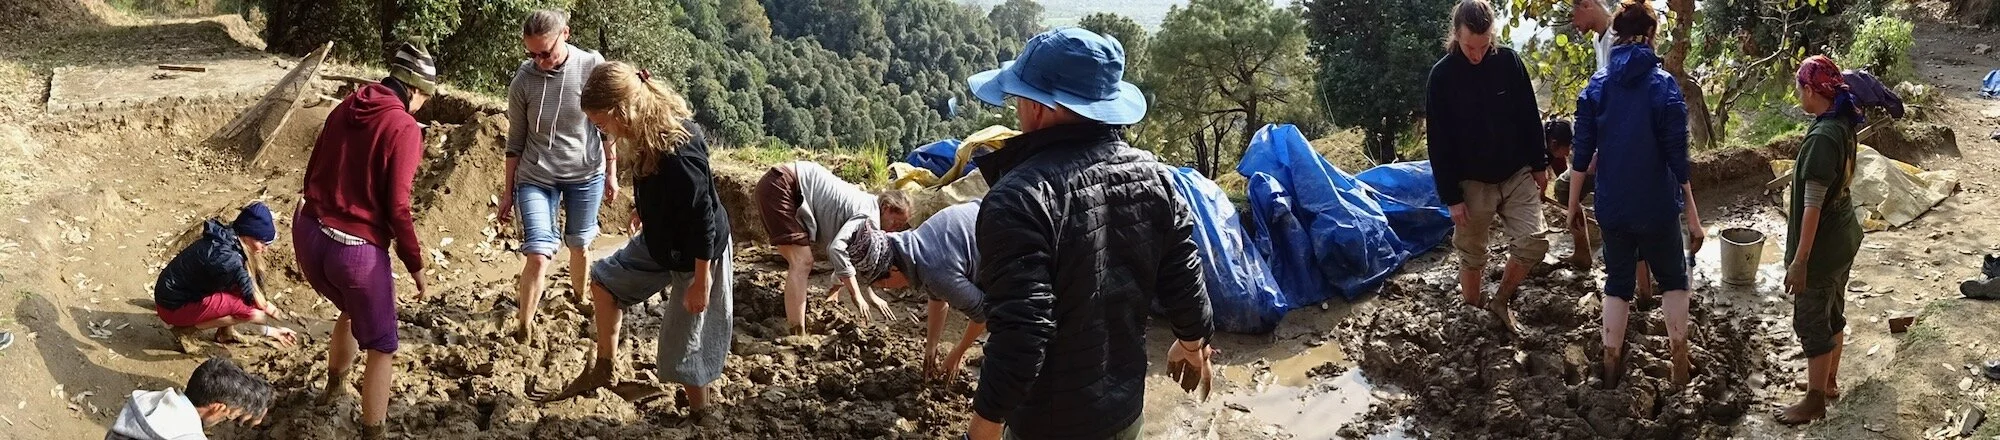
2. Pugging
The next step is pugging the sieved soil. The term pugging comes from the Sanskrit term ‘pug’ which means ‘feet.’ Why feet? The traditional way to mix the soil mix with water is using our feet! This step can and should (in my experience) include dancing, singing and playing with mud while mixing it, for a more joyful experience, not to mention better results!
First, the dry soil is made into a big pile and then the pile is hollowed out from the centre to make a volcano shape. Then water is poured slowly into the centre of the volcano and allowed to soak in slowly for a while (it can even be left overnight like this, covered with a tarp or something similar to reduce evaporation of the water from the centre of the volcano).
Now comes the fun part! We take off our shoes, roll up our pant legs, and step into the centre of the volcano. Pro tip: Most of us prefer to pug barefoot, but you may prefer to wear rubber boots if the soil is too rocky or the weather is too cold, or if you have cuts on your feet.) With our feet, we gradually mix the water into the soil until it becomes a mud mix of more-or-less even consistency.
While pugging, we learn to ‘see with our feet’, to keep an eye on the mix for any dry lumps of mud. Wherever we find dry spots, we mix more water into them. The mixture is periodically rotated by using a shovel to shift the mud from the bottom up to the top, only to be stomped back down again.

Every day, pug the mix for at least an hour. Then use your tools to shape the mix into a mound (which we call ‘closing’ the pile). Generously sprinkle water on the mound and then cover it for the night to prevent it from drying out.
The next day, remove the cover and ‘open’ the mound by breaking it apart with your tools, adding splashes of water as needed to keep the smooth-yet-firm muddy consistency. If it was kept well covered overnight then it should still be moist and not too difficult to break open. (Pro tip: If the pile is too dry and hard the next morning, try adding more water next time you close the pile, and cover it with something that will provide better protection from evaporation, like a tarp or a couple of layers of wet canvas.)
Do this every day: open, pug, close into a mound, keep moist and covered overnight.
On the fourth day, pine needles (or straw) and rice husk are mixed into the mix as well. This is usually done in the morning right after opening the pile. You’ll probably need to add a little more water at this point.
By the fifth day, the mix should be feeling pretty smooth and homogenous (even though we know that on the microscopic level an ideal mix is actually quite heterogenous, still, to the eye and to the feet it will seem more homogenous now after being thoroughly pugged for five days). After being pugged on the fifth day, the mix is ready to be made into bricks!
How much pugging?
This repetition of pugging and folding is one of the best-practice keys to ensuring that the mud is very thoroughly mixed, which is critically important because that’s how the water particles get in between the clay particles, which in turn is what creates the strongest bond between the aggregate (sand and silt) and the binder (clay). In fact, this is so important that it should be done for at least four nights and five days. The formula is simple:
more pugging = stronger bricks = stronger building.
What you’ll notice is that, with each passing day, the mix will become smoother, more pliable, and usually stickier as well. This means the mix is gradually approaching the consistency that will make it ideal for best-quality bricks.
Once you experience this, you’ll understand why no one should ever ‘cheat’ by pugging for only a day or two. There’s a quite dramatic improvement in the quality of the mix (and thus the quality of the bricks made from it) after the third and fourth days of pugging, as the water keeps mixing with the clay particles, while sand and silt keep filling the gaps.
This process is similar to kneading dough. We keep kneading until the dough is smooth and elastic enough, with water and other ingredients mixed with all the particles of the flour. We basically are trying to achieve something similar with mud here.
Note: There’s no harm in pugging a mix for even longer than five days, but after the fifth day the improvement brought by additional pugging is comparatively minor, so there’s no significant advantage to pugging for more than five days.
However, if you’ve made a pile so big that you can’t use it all in one day for brickmaking, don’t worry: whatever is left over at the end of your day of brickmaking, you can simply close that back into a mound, moisten and cover it, and open it again the next morning to continue. You can keep doing this day after day until the mix is all gone.

Left: Standard brick frame. Right: Corner brick frame
3. Forming the bricks
We use three standard wooden brick frames:
full bricks
corner bricks
queen closer bricks (half of standard brick width)
Having custom-sized bricks help us save both time and material as we don’t have to break bricks on site so often.

Soaking all parts of our frames in water
Before we start are brick-forming session, our frames are soaked in buckets full of water.
While the frames are soaking, the flat area where bricks are to be made is cleaned and re-levelled if necessary so that the bricks can lay as flat as possible on smooth ground and don't get deformed. One can also cover the ground with extra rice husk (or similar) so that the bricks don’t get stuck to the ground (though this isn’t so necessary if the bricks can be allowed to dry in place).
The brick frames are then cleaned with a wet cloth, and placed on level ground.
A big chunk of pugged mud mix is then thrown inside the frame and pressed thoroughly with a flattened hand to squeeze out any air gaps, thereby making the brick more densely compacted (which will contribute to its strength).
A small amount of water is then sprinkled onto the top surface of the brick, and then immediately one hand sweeps across the top of the brick to smooth the surface.
Just after the surface is smoothed, the tradition we follow is to create what is called a ‘frog’, which is a unique pattern that each brickmaker creates as a kind of ‘signature’ on the brick, which is usually carved gently into the top surface of the brick with one or two fingers. Aside from being a fun way to personalize our bricks, the frog also provides a place for the top surface of the brick (which is otherwise smooth except for the frog) to catch mortar during masonry, which in turn helps make a better bond between courses of bricks (which contributes to a stronger wall).
Right after the frog is made, the brick frame is lifted up carefully while holding the frame with two hands on the opposite corners. One needs a bit of practice to lift the frame without causing any deformation of the brick. It is important to do this process mindfully and patiently, but on the other hand the mud mixture and the frame shouldn’t become too dry, so the time taken to complete this whole process plays an important role as the mix may tend to stick to the frame more if we wait too long to finish the process. Don’t worry: one naturally gets the hang of it with practice!


4. Drying
Once, the frame is removed, the adobe brick is left to dry in the sun. It’s important to leave the new-born brick completely undisturbed (not touched at all) for at least the first day or two, starting from the very moment the frame is lifted away from the brick. This period is called ‘curing’, and this is another crucial time in determining how strong the brick will be (and thus how strong your walls and building will be). If a brick is disturbed too early, before it has cured enough, it will forever be weaker.
But after curing properly (usually 1-2 days if the sun is strong, or maybe 2-4 days if the sun is weak), it is then safe to rotate the brick gently onto its side, using both hands and being very slow and mindful. After the first rotation, leave it undisturbed again for at least another day before rotating again.
After two or three weeks of continued drying in well-ventilated stacks, the bricks should be fully cured and safe to move (carefully) to be stored in stacks any location where they’ll be protected.
(Pro tip: if there’s any chance of rain, keep a cover nearby that’s big enough to cover all your baby bricks, as rain can quickly destroy them while they’re still curing — and it’s wise to cover them overnight if there’s any chance of night showers.)
Drying time
The total time it takes for a brick to dry completely in the sun will vary greatly depending on the climate, the temperature, and the strength of the sunlight. In very hot, dry, and sunny climates, the bricks might be completely dry (or at least dry enough to move safely) within about five days of strong sun and clear skies. But in colder, damper, and/or cloudier situations, it could take up to 10-14 days. Your senses (aided by experience over time) will become the best instrument to determine when the brick is ready.
After the bricks are completely dry to the touch, they may still be wet inside for a few more days. During this period they can be stacked carefully in a way that keeps plenty of space between them for ventilation. It’s best to stack them this way right on (or right next to) the brickmaking site itself if possible so that they can continue to dry completely before being handled too much).
Quality testing
Make a few test bricks by following all the instructions above, and then let them dry completely without being touched at all (other than to turn it on its side after the 2nd or 3rd day). After they are completely dry (usually 4-7 days in good sun, give or take),
drop them (one at a time) from shoulder height onto a hard, flat surface and check how they behave when they hit the ground.
If the brick shatters into smaller pieces, the mix is not good (either not enough clay or not pugged thoroughly enough, as we’ll explain below, or often both). In this case, study some of the bigger pieces of the broken brick to learn more about its properties. Do they feel crumbly and brittle? If so, maybe more clay is needed, and/or a lot more vigorous pugging.
If the brick breaks into just two or three pieces, that means you’re pretty close, but there’s still room for improvement (probably by doing another day or two or three of pugging, or possibly by using a mix with a bit more clay content). Bricks like these (that break into 203 pieces when dropped) can be used in simple structures like benches or non-load-bearing walls, but are not safe for use in load-bearing walls in inhabited structures.
If the brick doesn’t break at all, that means the mix has a good sand-and-silt-to-clay ratio and really good tensile strength, and the brick was made well.
Congratulations! Your bricks are ready to be used in a building!

Conclusion
One of the recurring themes here is that one needs to be patient and mindful with the whole process to achieve the best possible specimen of an adobe brick.
Each step along the way provides opportunities for either laziness and sloppiness or care and diligence — and each of those steps will determine the quality of your bricks, and therefore the quality of your walls and your building. So it follows that some of the most important ‘skills’ to learn in earthen brickmaking (as in all aspects of earthen building) are patience, gentleness, and careful attention to detail. The results of cultivating this caring approach are so well worth it, and it makes the whole process more enriching, too!
C o m p a s s i o n a t e L i v i n g R e s o u r c e L i b r a r y
HOW-TO SERIES | COMPASSIONATE LIVING | DESIGN | EDUCATION | FOOD-GROWING & LANDSCAPING | HEATH & WELL-BEING | NATURAL BUILDING
RECOMMENDED BOOKS AND FILMS | FREE ONLINE RESOURCES | PARTNERS & ALLIED ORGANISATIONS